This tutorial outlines how to create USPS 24 Digit IM Tray Labels (including flat tub and sack labels) with IDAutomation’s Code 128 Barcode Fonts, Label Software, Crystal Reports, and other barcode generation products. This tutorial should be used with USPS-L-3216 for additional formatting and placement specifications. USPS-L-3216 specifies ISS Code 128 to be used as the barcode type, which is compatible with all Code 128 products IDAutomation offers.
Determine the data that needs to be encoded in the barcode label, referred to in IDAutomation documentation as the DataToEncode. Tray Labels consist of 24 digits of numbers in various formats. This tutorial will use the number 123456781123456123123451 which was obtained from Page 7 of USPS-L-3216A.
Determine which product to use to generate tray labels. IDAutomation offers easy-to-use Barcode Label Software, which is a stand-alone application. Additionally, IDAutomation offers Barcode Fonts and Barcode Components, which can be easily integrated into an existing application or print process.
Barcode Label Software Tutorial
- To generate labels, consider the Barcode Label Software. Within IDAutomation’s Barcode Label Software, choose to create a new label. The label used in this example is also available for download.
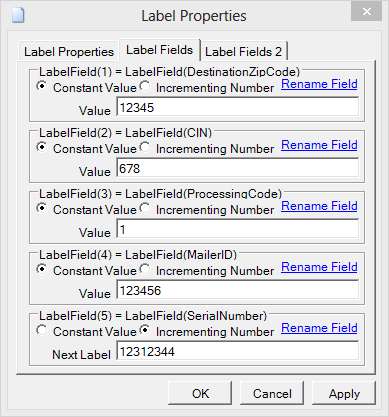
- Data will be encoded in the barcode as a single value, which is made up of constant and incrementing values combined. In this example, data will be implemented as a VB script formula with constant and variable fields data as defined on Page 17 of USPS-L-3216A according to the following chart.
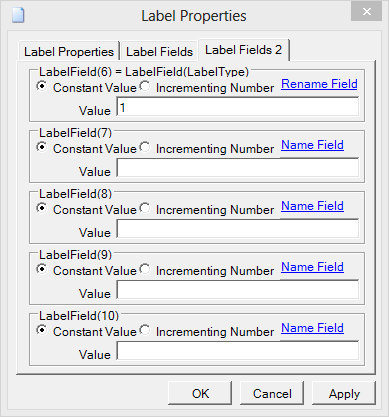
Field Name Field Size Data Field Type DestinationZipCode 5 12345 Constant CIN 3 678 Constant ProcessingCode 1 1 Constant MailerID 6 123456 Constant SerialNumber 8 12312344 Incrementing LabelType 1 1 Constant - Ensure that no objects are selected on the label and choose Edit – Properties, which opens the label properties dialog. Add the field names from the chart above with appropriate data. Choose the “Rename Field” link to rename each field so it may be properly referenced within the label. Make sure the SerialNumber field is an Incrementing Number.
Additional fields can be entered on the next “Label Fields 2” tab.
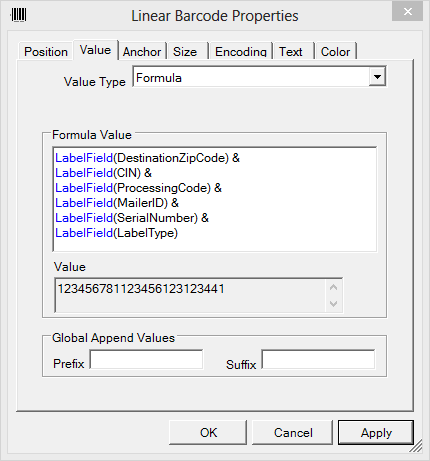
- Choose the Linear Barcode icon, right-click on the barcode object and choose Properties.
- Choose the Value tab. Change the Value Type to Formula and enter the following VB script:
LabelField(DestinationZipCode) & LabelField(CIN) & LabelField(ProcessingCode) & LabelField(MailerID) & LabelField(SerialNumber) & LabelField(LabelType)
- Right-click on the Linear Barcode object and choose Properties. Choose the Size tab; change the X Dimension to 15 mils, the height to .72 inches, and other specifications according to USPS-L-3216.
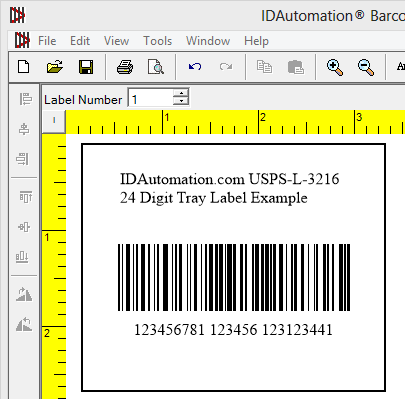
- Choose Apply. The barcode should appear with the correct number below it.
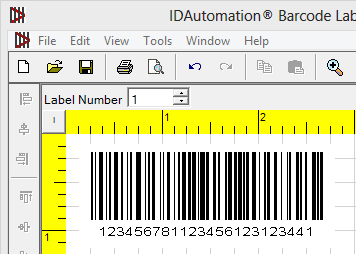
Since the specification requires that spaces exist between some fields of data, this text interpretation must be disabled and created manually with a text object. - Right-click on the Linear Barcode object and choose Properties. In the Text tab, choose No Text to disable the text interpretation from the barcode.
- Create a text object below the barcode. Right-click on the text object and choose Properties. Choose the Value tab, choose the Value Type of Formula and enter the VB script of
LabelField(DestinationZipCode) & LabelField(CIN) & LabelField(ProcessingCode) & " " & LabelField(MailerID) & " " & LabelField(SerialNumber) & LabelField(LabelType)
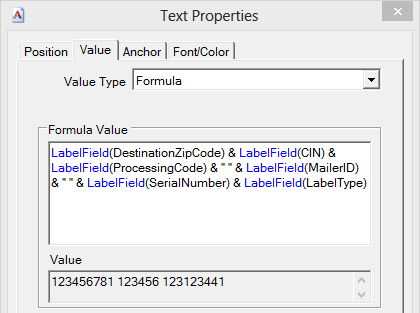
Notice the spaces added in this script to separate the fields.
- The barcode should be complete, and the data may be changed accordingly. As the label is advanced, the serial number should change in the text object and in the barcode. After a successful print job, the serial number field is advanced to the last printed label so that the same number will not print twice. This unique serial number memory functionality is provided in all versions of the IDAutomation Barcode Label Software.
- Format other items required in the label according to USPS-L-3216 or the latest equivalent specification. Test scan the result with the IDAutomation USB Scanner or another compatible barcode scanner. In some cases, the printed result of the barcode itself may be larger or smaller than what appears on the screen. This is because the software has to perfectly match the pixels of your printer to the barcode itself and is normal.
Barcode Font Tutorial in Crystal Reports
- IDAutomation’s Code 128 Barcode Font was created according to ISS Code-128 specifications and may be used on any operating system to create precise, device-independent barcodes. When using fonts, each system making use of the symbol must have the font installed until it is printed or saved as an image. If this is the product of choice, download or purchase the font.
- Once the font is installed, examine the list of Font Encoders (Font Tools) and implement the appropriate encoder. For purposes of USPS-L-3216 Tray Label implementation, only the Code128C function will need to be utilized. The encoder is necessary to properly format the data to the font itself and calculate the checksum character as required. This tutorial will use the Crystal Reports Font Formulas as the Font Encoder.
- Follow the Crystal Reports Font Formula Tutorial to create a Code 128 Barcode with the font. To format the font properly and encode the data, use the formula editor and enter a formula that creates the correct result using fields from the chart referenced in Step 2, for example:
DataToEncode = {USPS-L-3216A.DestinationZipCode} & "6781" & "123456" & {USPS-L-3216A.SerialNumber} & "1"Substitute database fields and constants within the formula example as needed.
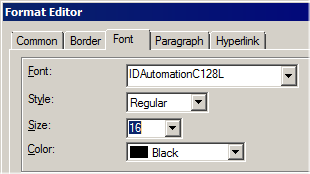
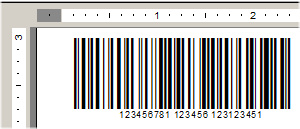
- Add the USPS_Tray_Label field to the report. Edit the font properties of this field and select the IDAutomationC128L font at 16 points. This will produce a barcode that is 13 mils and .75 inches tall for USPS-L-3216 requirements.
- Create an additional text field for the human-readable area below the barcode.
- Test scan the result with the IDAutomation USB Scanner or another compatible barcode scanner.